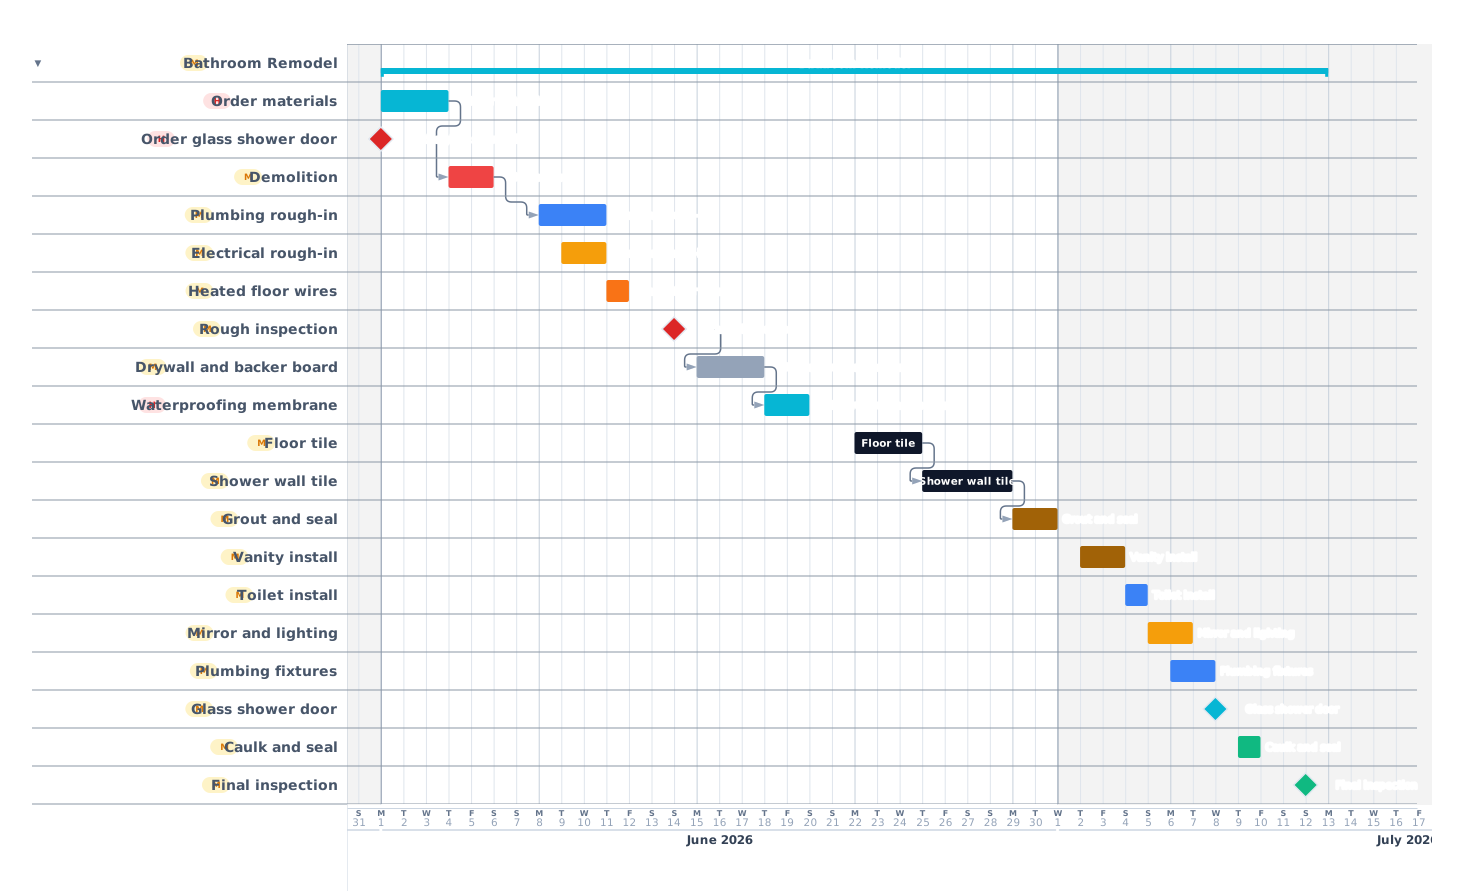
A 6-week bathroom remodel covering demo, plumbing, waterproofing, tile, vanity and fixtures, with the waterproofing and tile sequences that decide whether a shower leaks in five years.
Bathrooms look simple because they are small, but they have more failure modes than any other room, because everything is wrapped around water. Get the waterproofing sequence, the slope of the shower pan, or the order of tile and grout wrong, and you have a leak in five years. This 6-week template lays out the order of operations that experienced bathroom remodelers actually use, with realistic durations for each step.
How a 6-week bathroom remodel breaks down
01
Design, order, demo
Week 1
Order the vanity, tile, fixtures, and glass door (custom glass has a 3-week lead time). Demo the existing bathroom (fixtures, tile, drywall) down to the studs. A typical bathroom demo is one to two days for two people. Strip the floor down to the subfloor.
Finalize tile, vanity, fixtures, glass door selections
Order materials (especially glass door, 3-week lead)
Demo to studs and subfloor
Haul debris
02
Rough plumbing and electrical
Week 2
Plumber relocates supply and waste lines for the new layout. Electrician runs circuits for new lighting, GFCI outlets, exhaust fan, and any heated floor. Rough inspection happens at the end of the week. Without a passing inspection you cannot close the walls.
Plumbing rough-in
Electrical rough-in
Heated floor wires (if applicable)
Rough inspection
03
Drywall and waterproofing
Week 3
Hang cement backer board in the shower, regular drywall everywhere else. Apply waterproofing membrane to all shower walls and the pan. This is the step that prevents long-term leaks. Slope the shower pan correctly toward the drain (1/4 inch per foot). Skip this step and there is no recovering.
Cement board in shower
Drywall on remaining walls
Waterproofing membrane (walls and pan)
Slope shower pan toward drain
04
Tile and grout
Week 4
Tile is the longest single phase. Floor tile first, then shower walls, then niches and accent tiles. Let mortar cure 24 hours before grouting. Grout, then seal grout 24 hours after grouting. This phase is slow because curing time is not negotiable.
Floor tile
Shower wall tile
Niche and accent tile
Grout
Seal grout
05
Vanity, fixtures, finish
Weeks 5–6
Vanity, mirror, lighting, and toilet install. Plumber returns to connect supply lines and trap. Glass shower door is the last thing in. The installer needs the tile complete to measure. Caulk every seam, check for leaks, final inspection.
Vanity install
Toilet install
Mirror and lighting
Plumbing fixtures (faucet, shower head, drain)
Glass shower door
Caulk and seal
Final inspection
Tips from finished bathroom remodels
01Order the glass shower door in week 1. The 3-week lead time is the biggest constraint on the whole schedule.
02Do not skip the waterproofing membrane. The added cost is small; the cost of redoing a leaking shower is enormous.
03Slope the shower pan 1/4 inch per foot toward the drain. Less than that and water pools.
04Tile the floor before the walls. The floor has to be perfect before the walls because the walls sit on top.
05Pick a contractor who specializes in bathrooms. Generalists are fine; specialists are dramatically better.
Frequently asked questions
How long does a bathroom remodel take?
4–8 weeks for a standard bathroom. This template targets the 6-week middle case. Half-baths can be done in 2–3 weeks.
Why is waterproofing so important?
Cement board alone is not waterproof. Water gets through the grout, through the cement board, into the framing, and you have rotted studs in 3–5 years. The membrane is the only thing that stops it.
Do I need a permit?
For a remodel that changes the layout (moving plumbing or electrical), yes. For a like-for-like replacement, usually no. Check your local building department.
 Gantt Chart Maker